How to use adhesive vinyl? Turn simple ideas into creative crafts with our hands-on guide. Explore the difference between permanent and removable vinyl while mastering applications on mugs, tumblers, laptops, and car decals. Follow our clear, step-by-step instructions to confidently complete your first custom label or home decor project.
What Is Adhesive Vinyl? And How To Use Vinyl?
Adhesive vinyl is a very thin PVC material on one side with a sticky back that adheres to hard and smooth surfaces. When pressed down, the adhesive sticks well; hence, it is great for decorative or labeling purposes.
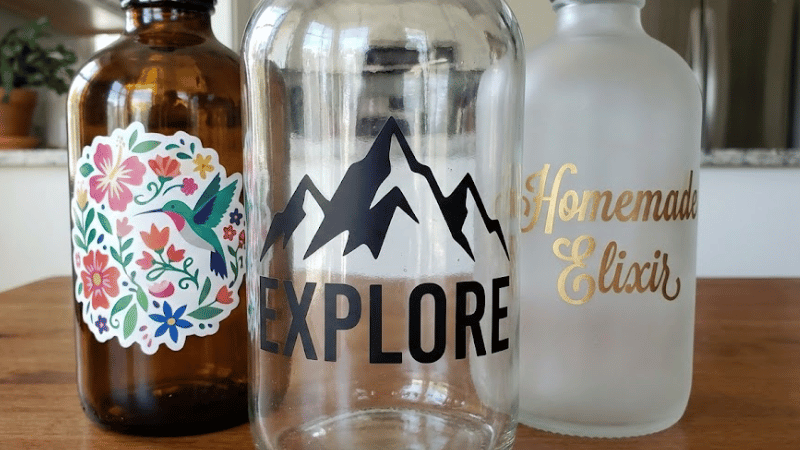
You can design hundreds of project surfaces with the help of premium vinyl to personalize tumblers, laptop covers, storage containers, mirrors, plastic bins, car decals, and others. Adhesive vinyl can be mainly classified into two categories, which are permanent vinyl and removable vinyl.
Permanent vinyl:
Permanent vinyl is a uv-resistant film, and it is heavy-duty, weatherproof, and outdoor-safe. It clings well to even direct exposure to water, or frequent handling next to surfaces such as mailboxes, and metal signs.
Removable vinyl:
The other one is removable vinyl, which is a lighter concept used mostly for indoor projects. The removable adhesives are best for wallpapers, temporary tags, decorations, or places where damage will be an issue while removing the vinyl.
Adhesive vinyl can be stuck best onto surfaces such as glass, sealed wood, stainless steel, some metals, and ceramics. These are UV-resistant films. So as long as the surface is non-porous and never oily with dust, the adhesive vinyl will stick on it for years.
But you need to take great care of vinyl wraps. There are some tips for cleaning and caring for your vinyl wrap. Wash it with clean water and do aftercare with a microfiber towel.
Step-By-Step Guide on How To Cut And Apply Vinyl Decals
So, let’s start step-by-step guide on how to cut and wrap the vinyl decals on the project surface:
Step 1: Prep Your Cut File
In order to cut your vinyl mat, you must have a digital cut file. Cut files are the directives that tell the cutting machine how to carve through the design, depending on your settings.
What is a Cut File?
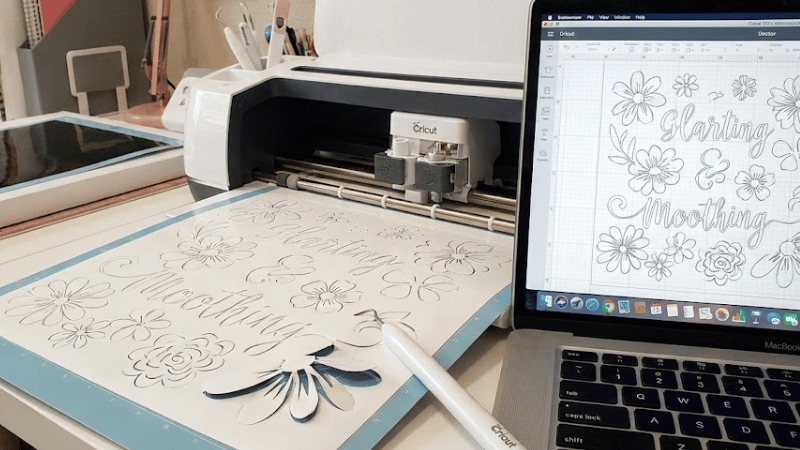
Cut files usually come in two mediums: SVG or PNG. SVG files are the best ones because they are vector-based, meaning that you can enlarge them as much as you wish without loss of resolution. Hence, the cut lines from SVG will be very sharp and clean by machines like the Cricut or Silhouette.
PNG files can also be used; however, PNG is a type of flat image. You may require other minor adjustments, like tracing in the software.
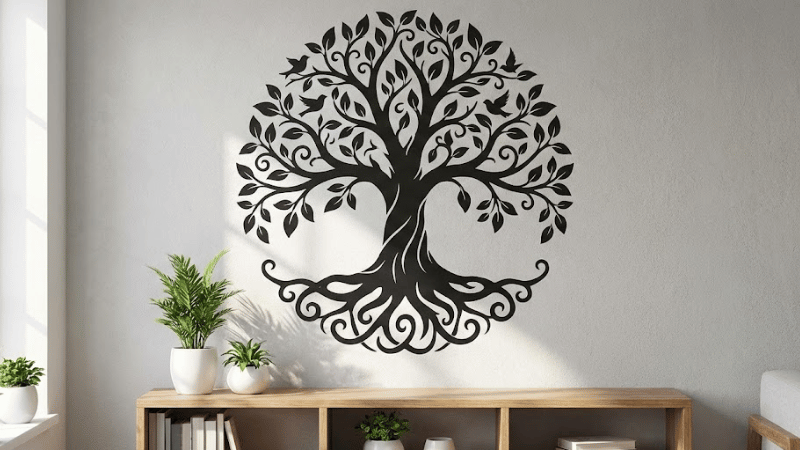
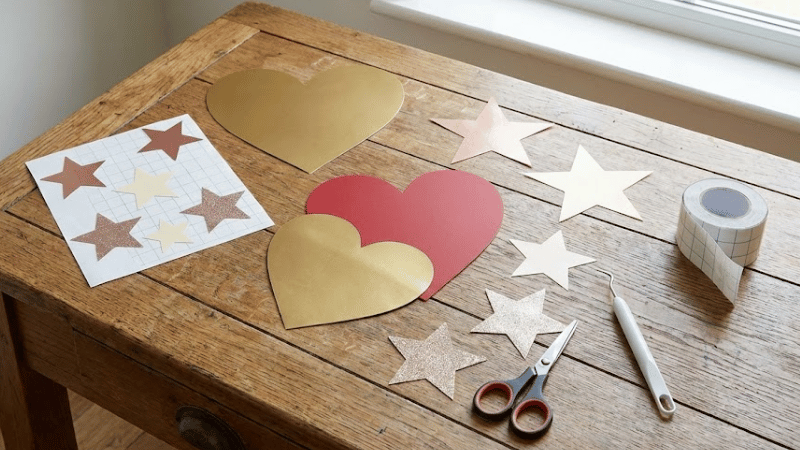
You can use it to cut easy things like a heart or a star, or you can do some designs with complex details, including monogram designs, inspirational quotes, personalized content and ads, labels, geometric patterns, or totally customized logos.
Most beginners get started with labels or even very small single-color designs.
Where to Find Cut Files
There are several places on the Internet from which you can grab cut files. Cricut has thousands of ready-made cut files in its Design Space, and Silhouette Store has similar files too.
Another popular marketplace for designer-made SVGs of all themes is Etsy and Creative Fabrica. Also, some free SVG sites will use cookies and data, and hook you up with the basic ones to practice on before you start working on the bigger projects, like a vinyl car wrap.
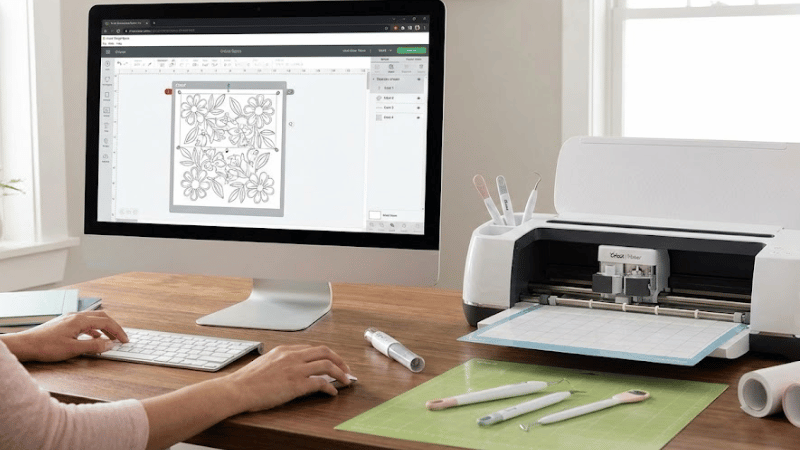
Preparing Cut File in Cricut or Silhouette Software
Once you select your design, upload it to Cricut Design Space or Silhouette Studio in the computer. This first adjustment deals with aspect ratio changes to it so that it really fits the surface you want to decorate.
For example, if you are making a label for a jar, you will have the jar measured. If you are applying it to a tumbler that has a curved surface, you will want to ensure that the design is small enough.
After you resize the design, make sure to group or attach the layers so that the machine cuts everything exactly where it should.
Some designs have many parts, attaching keeps them together, preventing separation from each other while cutting. And for the very much emphasized beginners’ remembrance, never use mirror adhesive vinyl during cutting.
Mirror cutting is only meant for heat transfer vinyl (HTV) due to thermodynamics; it doesn’t apply to adhesive vinyl at all. Most new crafters make this mistake, so do not fall into this trap and keep it just as you see on your screen.
Step 2: Cut Your Design from Vinyl
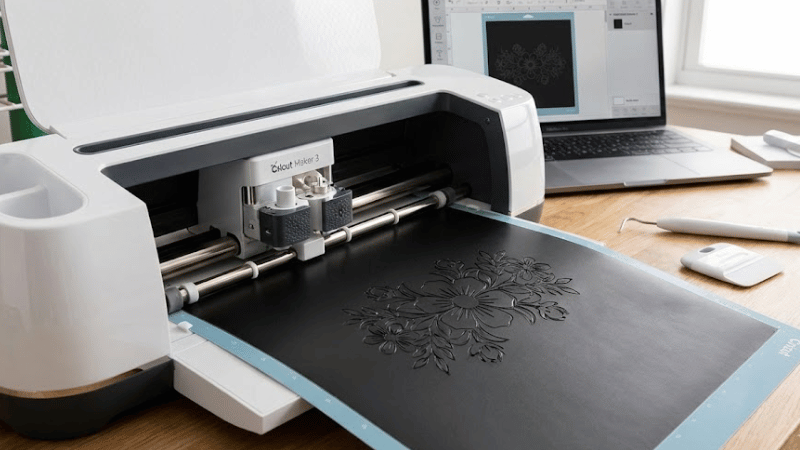
The actual process for cutting the vinyl is very easy once the file is set up for cutting.
Choose the Right Vinyl
Choose the suitable vinyl materials according to the purpose. Permanent vinyl is better for outdoors or anything that needs a long life, such as a car decal or a water bottle, due to the heat-activation process.
Removable vinyl is easier to peel off later; it’s best to use wall art or temporary labels. Both come in gloss or matte finishes, whichever finish suits your fancy.
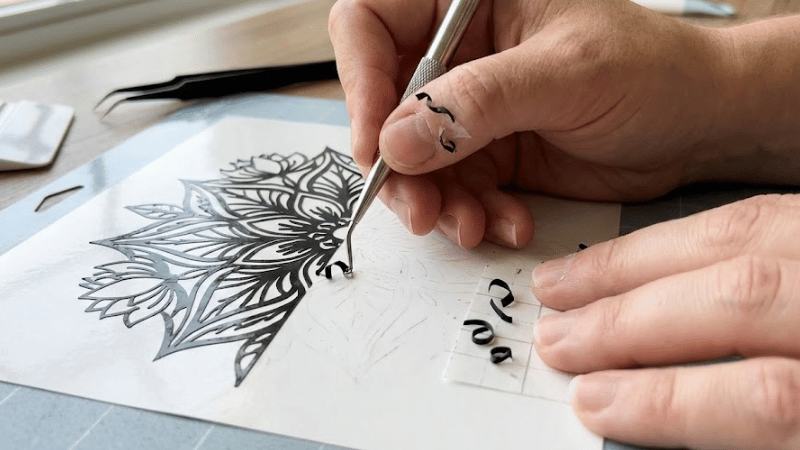
Step 3: Weed Your Vinyl Design
Weeding is the action of extracting unwanted vinyl from the remaining little pieces (what you want to keep). Many people think it is the most boring part of the whole procedure, but it will go really well with practice and faster.
There are some primary weeding equipment, hooks, tweezers, or craft blades. Start from the corners and peel to free the excess vinyl.
Work slowly so as not to pull parts of your design. Good light will help see the cut design much better, especially when using a light or glossy vinyl color. Collect all the little scraps for testing and practicing test cuts and weeding to enhance the quality of your work.
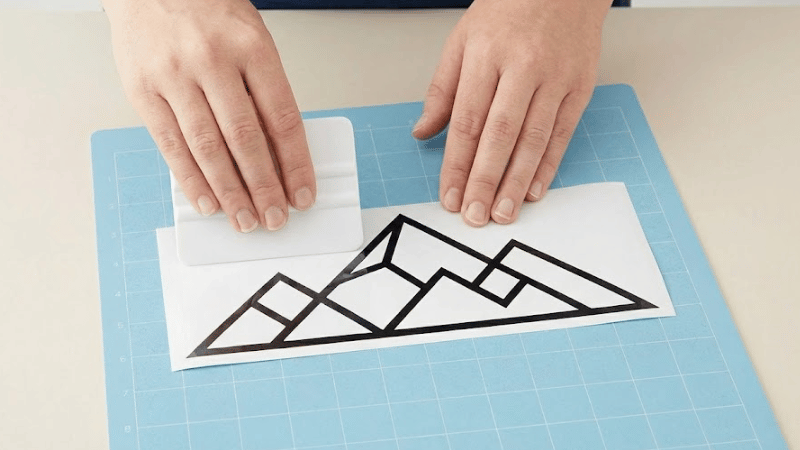
Step 4: Use Transfer Tape to Apply the Decal
When your design is weeded, now, you need a standard transfer tape to lift it off its backing and place the vinyl onto whatever surface. Cut a piece of transfer tape wider and longer than your vinyl for strong cohesive forces. Unpeel its backing and lay the sticky side right over your weeded design.
Start from the top and lower it slowly to be free of bubbles. Firmly burnish the tape on the design with a scraper or credit card. Turn the vinyl over and just pull the backing away. Your design should now be stuck to the transfer tape and ready to be applied.
Step 5: Apply the Vinyl Decal to Your Surface
Now, let’s apply the vinyl decals to your desired surface and measure the effectiveness:
Preparing Surfaces
The cleaner the surface is, the longer the vinyl will last, saving extra cost of replacement. Cleans it entirely from oils, fingerprints, and dust, and bathes it in isopropyl alcohol, letting it dry thoroughly before sticking the decal. Do not use household cleaners; many leave a residue behind that does not let the vinyl stick very well.
Adhering Steps
Peel off the backing slowly from the vinyl tackiness until only the tape and design are left. Place the decal on the surface.
First, tape the top edge if it can be done (allowing adjustments in case readjustments need to be made), and then it is time to rub it down, starting from the center outwards when you are comfortable with its position.
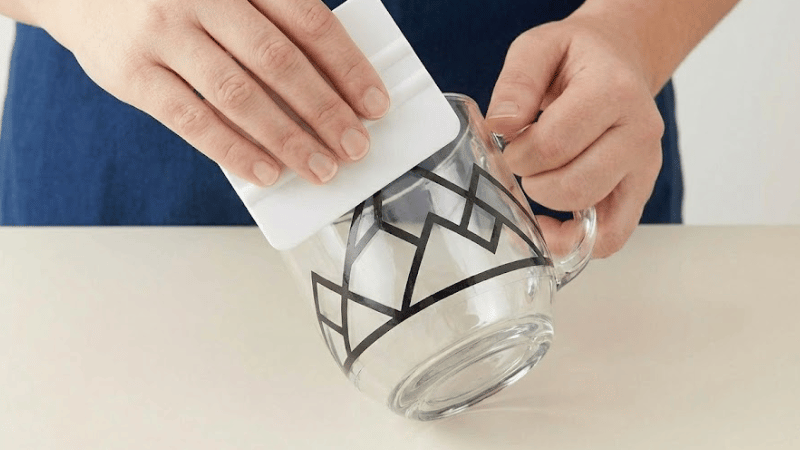
Burnish once more to ensure full adhesion before very slowly peeling the transfer tape back at an angle. Any part of the custom vinyl painting that lifts can be pressed back down and peeled again.
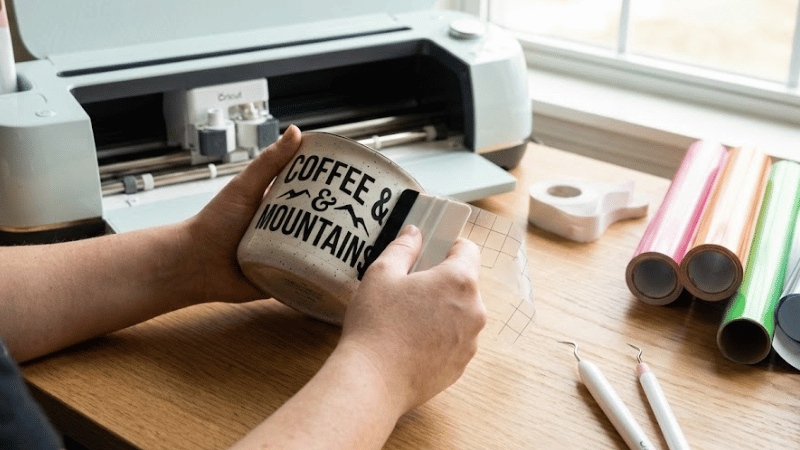
Ideal Tips for Application
Avoid stretching the vinyl as it will distort your design. If bubbles develop, unpinch them with a pin and then smooth them out. For curved sections such as mugs or tumblers, work in small sections to prevent a large number of wrinkles for better polymer bonding.
If you follow all these steps carefully, it will hardly take one to two hours to wrap, depending on the custom design and working area.
Permanent Vinyl Troubleshooting Guide
Here are the common problems and solutions to watch out while you’re wrapping a car or any other object.
One reason the vinyl will not adhere is that the surface is dirty or the transfer tape is too tough. In order for the surface to truly bond, rub it again with a lighter tack tape before using it again. If there is any case of small letters lifting with tape removal, burnish more.
To prevent an air pocket, slow the application of the vinyl, pressing outwards from the center for better viscoelasticity. If the vinyl tears while weeding, it is most probably because the blade is cutting too deeply. You need to make the adjustment to the blade settings.
Conclusion
Adhesive vinyl is simple to use, but requires learning one or two simple things to understand how to work with it. Try using adhesive or permanent vinyl to design wonderful custom creations for personal or professional projects. Start small and enjoy the process as you hone your skills.
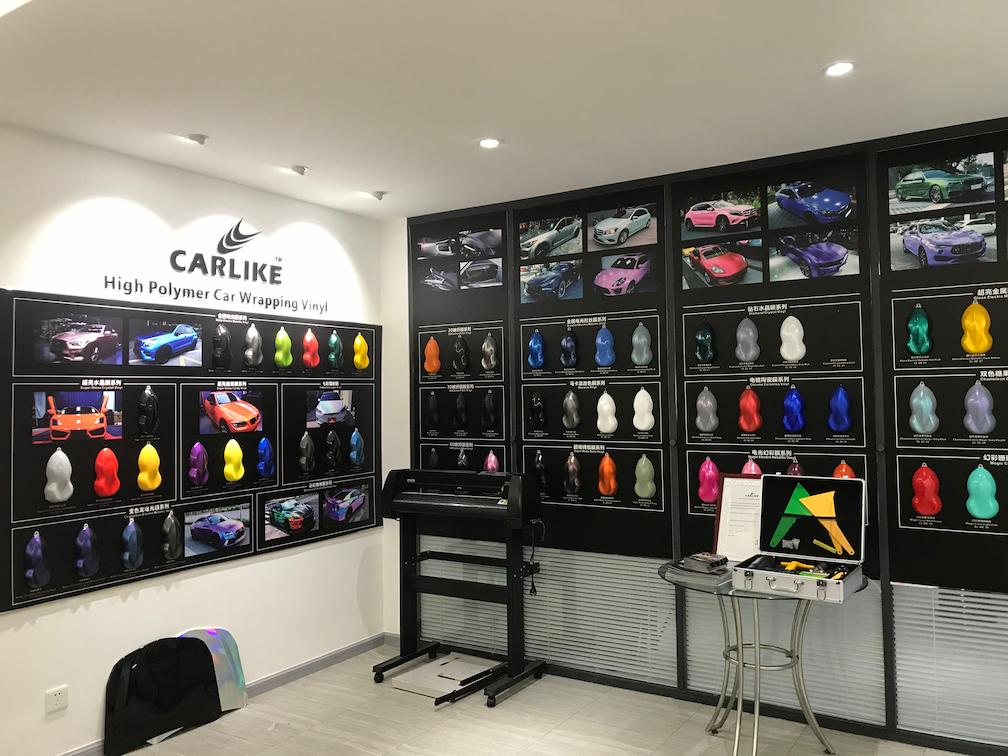
Elevate Your Vinyl Creations with CarLikeFilm
Elevate your vinyl creations with CarLikeFilm, where better solutions begin. We offer low MOQ, flexible OEM and ODM services, and lighting-fast shipping to support your vinyl business.
Contact us now for truly high-precision solutions in vinyl or labels for businesses. Let’s build something better together!
FAQs
Q1: Do you offer custom sizes and designs?
Yes, we offer custom sizes and designs to meet your specific needs. Our team will work closely with you to ensure the vinyl matches your requirements. Send us your inquiry now.
Q2: Why are vinyl decals superior to painted graphics for home or business branding?
Vinyl decals offer professional-grade durability without the permanent commitment or cost of paint. They withstand weather, resist fading, and can be precisely customized to elevate your brand’s visibility on windows, vehicles, and signage instantly.
Q3: Can vinyl decals transform ordinary surfaces without damage?
Yes. High-quality vinyl applies smoothly to glass, metal, walls, and more, creating vibrant designs while protecting the underlying surface. They remove cleanly when needed, making them ideal for rentals, seasonal promotions, or decor updates.
Q4: How do vinyl decals enhance marketing efforts cost-effectively?
Decals turn any asset into a marketing tool, from storefronts to company cars. Their one-time production cost and easy application generate long-term visibility, making them a smarter investment than temporary print ads or repetitive digital campaigns.